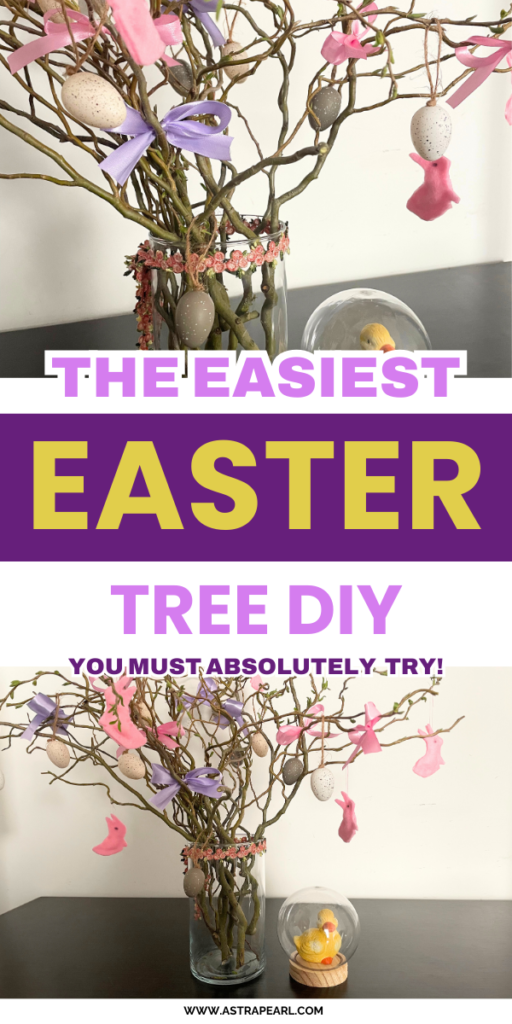
Discover in this post the best Easter tree DIY.
It’s finally time to gather and celebrate with your family and friends! To give them a warm welcome, you’ll need a beautiful Easter decoration.
If you don’t want to spend an awful lot of time creating your Easter decor, you simply need to find some quick and easy DIY.
I’m sure that this Easter tree DIY will impress all your guests and give a festive feel to your home. So, let’s discover how to create it!
This website contains affiliate links. This means that when you click on a product link and make a purchase within 24 hours, I earn a small commission at no extra cost for you. As an Amazon Associate, I earn commissions from your Amazon purchases when you click on my links. The money earned allows me to do what I love for a living. Thank you for your support!
How To Make An Easter Tree DIY
Materials List
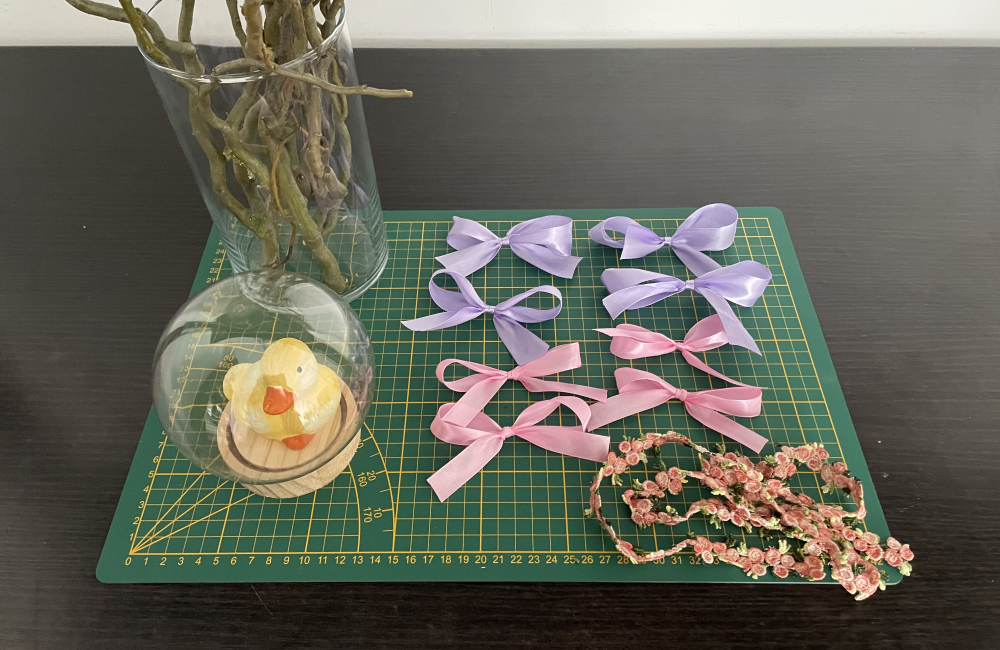
For this DIY, you will need:
- Curly branches: you can either use real or fake branches. I’m very lucky to have a tree with curly branches just next to my home, so I’ll use real branches for this DIY!
- ribbon bows: for this DIY, I went for pink and purple ribbon bows. I suggest going for pale colors such as yellow, green, or pink.
- Easter eggs: I selected gray and beige Easter eggs for a more minimalist look, but if you love color, go for it! Just make sure that your result is cohesive and fits your interior design style.
- felt bunnies: I created some pink felt bunnies as ornaments for this DIY.
- a bird figurine;
- a glass bell jar;
- a transparent vase;
- lace.
Where To Buy Materials For This DIY
Now, let’s realize our DIY, shall we?
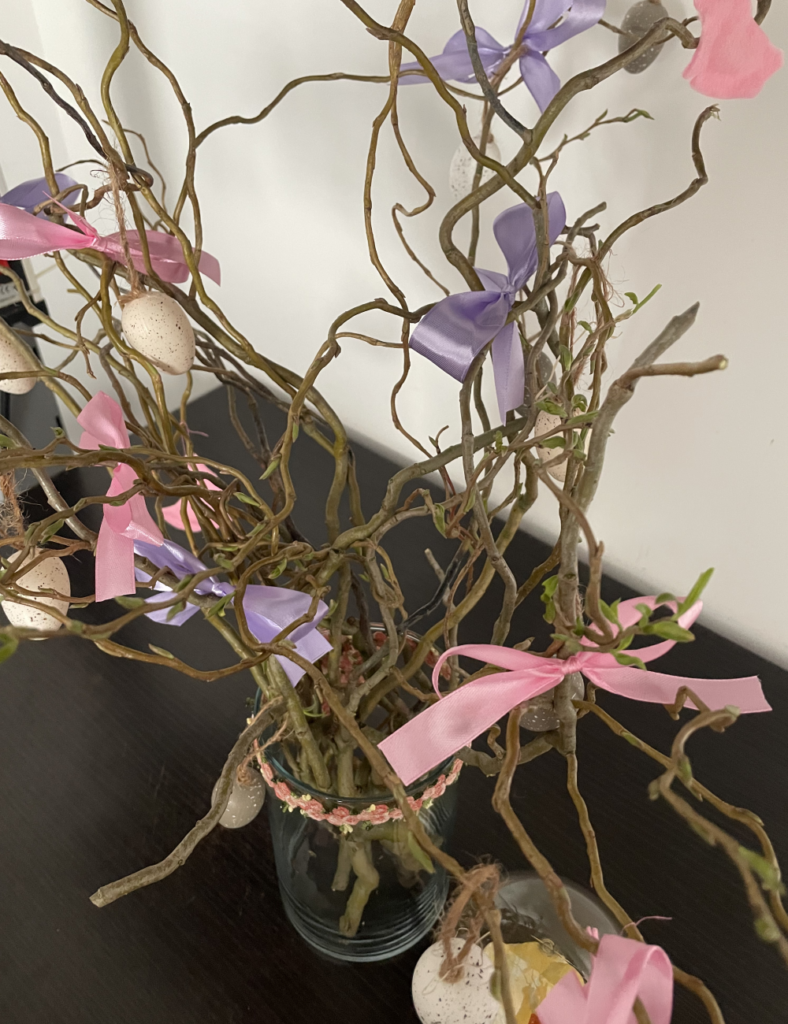
Step 1: Fill Your Vase
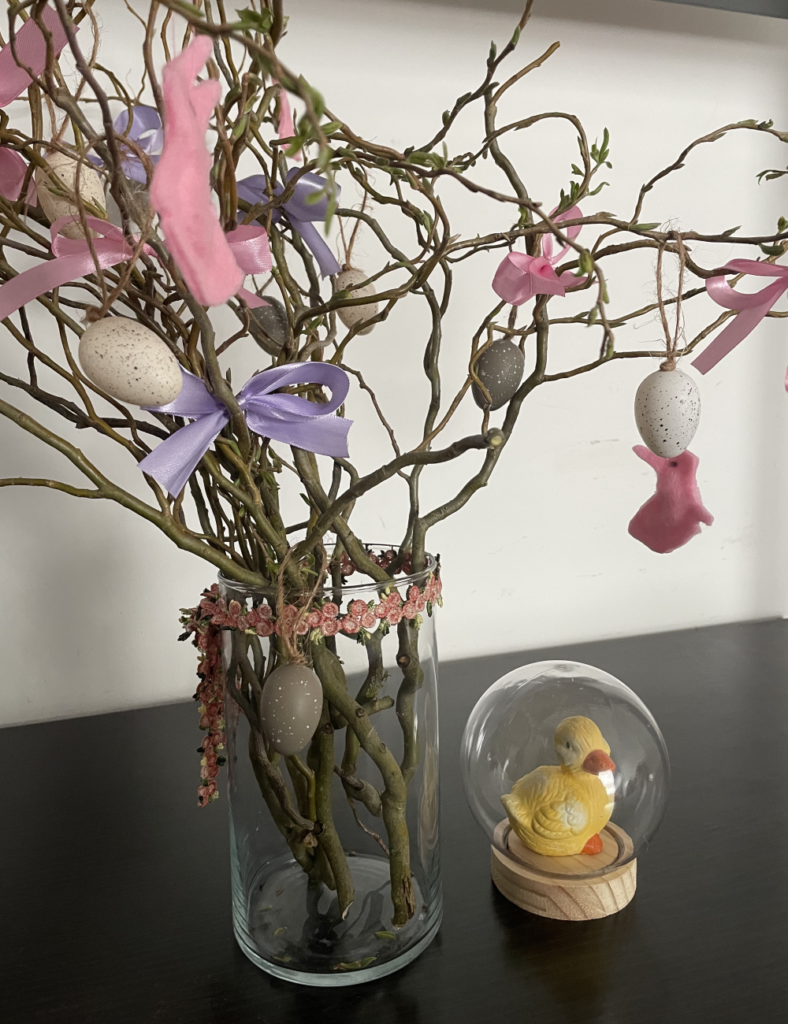
Place your curly branches in your vase. Then, put ribbon bows, Easter eggs, and felt bunnies on these branches.
I went for a pink and purple color palette with gray and beige Easter eggs for a minimalist touch.
Step 2: Customize Your Vase
I selected a transparent vase so I could see the branches through. If you don’t like that style, pick another vase.
You could choose a blue and white patterned vase if you have a vintage and traditional home, or a black geometric vase if you have a modern and minimalist home.
I wanted a feminine and coquette look, so I added floral lace to my transparent vase. Think about how you can customize your vase depending on your interior design style.
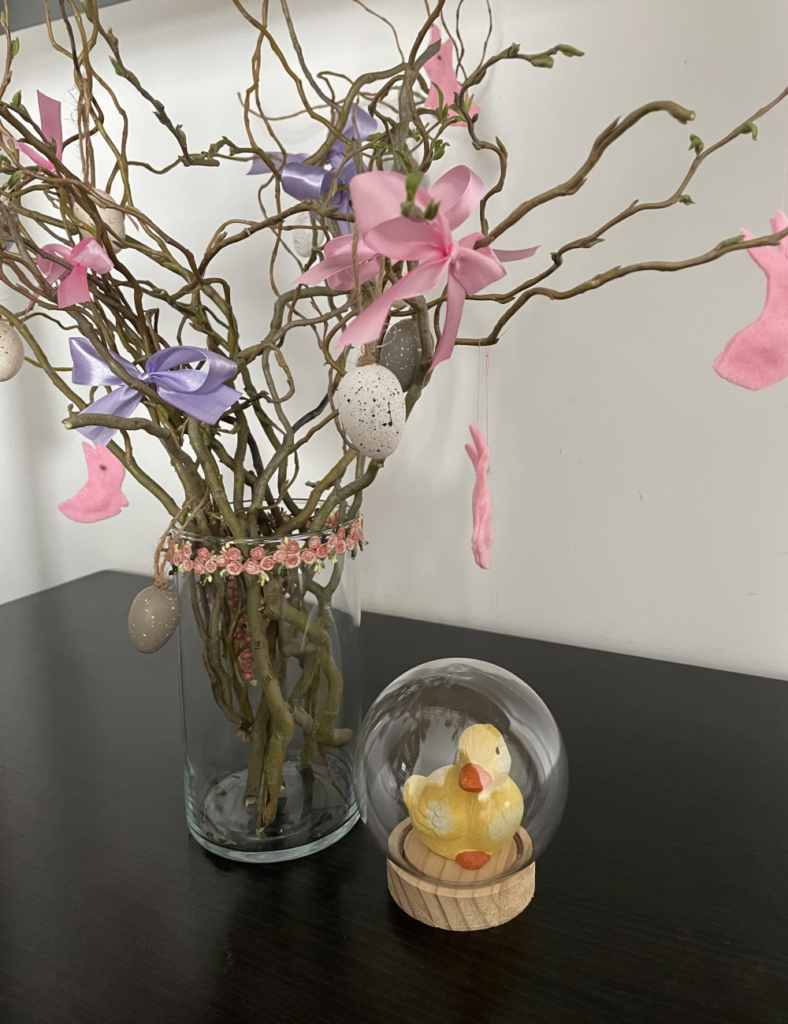
Step 3: Add The Finishing Touches
Lastly, place an Easter figurine next to your vase. I put a small bird figurine in a glass bell jar to add an enchanted and delicate touch to this Easter decor.
Now, let’s discover the final result!
So, here’s how my Easter tree turned out:
I hope this easy and quick Easter DIY gave you inspiration to create your own Easter tree.
Remember that to create your own Easter tree DIY, you must:
- Select the right branches: curly branches are really elegant and delicate;
- invest in some Easter ornaments: Easter eggs, felt bunnies, and ribbon bows are a good start;
- pick your favorite vase: don’t forget to make sure it fits your aesthetic;
- place an Easter figurine next to it: for a cute and lovely last touch!
Stay tuned for more Easter inspiration!
Discover More Easter DIY Ideas
- Make Your Own Easter Egg Garland Decoration – SO Easy and Quick!
- Late For Easter? This 10-Minute Easter Egg Garland DIY Will Save The Day!
- This 10-Minutes Easter Tiered Tray Decor Will Left You Speechless!
- Try This 10-Minute Easter Basket Decoration That Will Charm Your Guests!
- Learn How To Create This Crazy Simple Happy Easter garland DIY