Discover in this post the best spring bunny garland.
Spring is a time of joy and hope! Nature wakes up once again after a long winter. To bring a fresh and serene feel to your home, you must absolutely decorate it for spring!
Garlands are an easy and quick way to add a cheerful and festive touch to your small house. You can place your garlands on your mantel, at the top of your cabinet, or even on your chest of drawers.
Bunny garlands are really cute and so easy to make! So, let’s discover how to create a spring bunny garland that will give joy and hope to your home!
This website contains affiliate links. This means that when you click on a product link and make a purchase within 24 hours, I earn a small commission at no extra cost for you. As an Amazon Associate, I earn commissions from your Amazon purchases when you click on my links. The money earned allows me to do what I love for a living. Thank you for your support!
How To Make A Spring Bunny Garland
Materials List
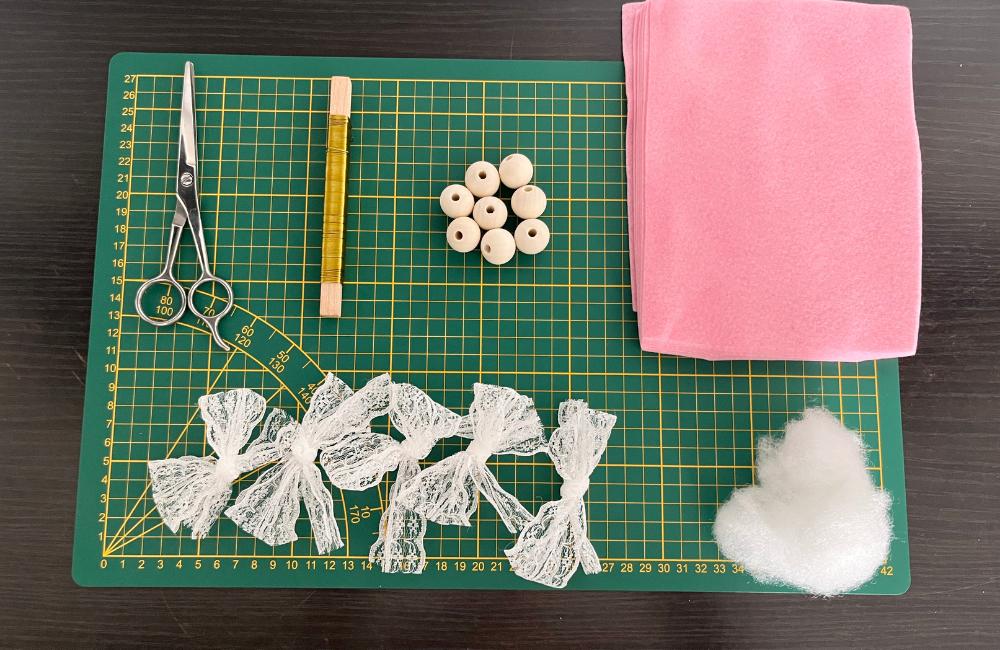
For this DIY, you will need:
- Wooden beads;
- lace bows;
- pink felt bunnies;
- a pair of scissors;
- and string.
Where To Buy Materials For This DIY
Now, let’s realize our DIY, shall we?
Step 1: Pick The Right Colors And Materials
I decided to go for a pink and beige garland. I wanted an authentic, feminine, and calm feel for this spring garland. But you can choose to make a colorful garland instead for a more joyful and radiant decoration!
I went for wooden pearls and white lace bows to give a natural, pure and delicate touch to my garland. This garland is perfect for farmhouse, minimalist, or rustic styles.
Feel free to select fake pearls, acrylic beads, or ribbon bows as well. It all depends on the look you are going for!
Step 2: Create Your Felt Bunnies
Creating felt bunnies is such a fun and relaxing activity! To do that, you will need felt sheets, fiber fill, a hot glue gun, and a pair of scissors.
Start by cutting a bunny shape on a paper sheet. Then, place your paper bunny shape on your felt sheet and draw the bunny shape on your felt sheet.
Now, cut your bunny shape on your felt sheet by following the lines you drew. Do it another time. You now have two felt bunny shapes.
Add some hot glue to the first bunny shape so you can stick the second bunny shape on it. Make sure you leave a hole so you can stuff your bunny with the fiber fill.
Once it’s done, glue the hole. You now have your felt bunny!
Step 3: Add Everything Together
Take your string and tie a knot. I selected a wire string and I added a white thread to each felt bunny so I could easily tie them to the string.
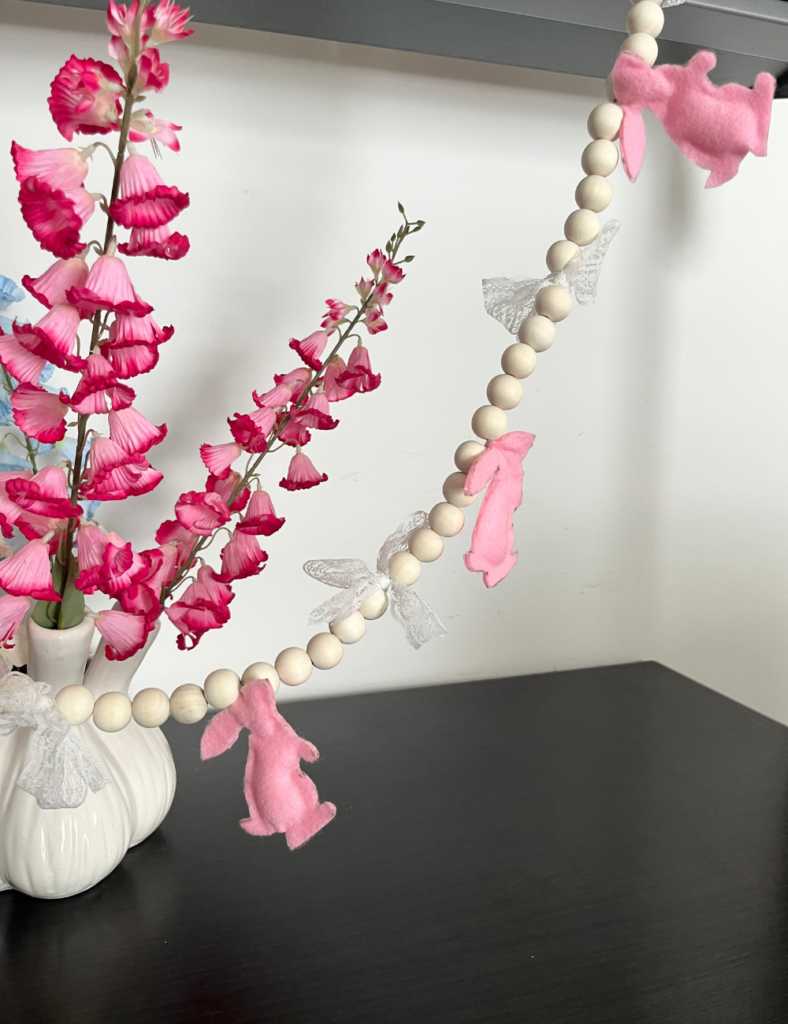
Then, thread five wooden beads, a lace bow, five wooden beads, a felt bunny, five wooden beads, a lace bow, five wooden beads, a felt bunny, and so on.
At the end of your garland, tie another knot to secure it.
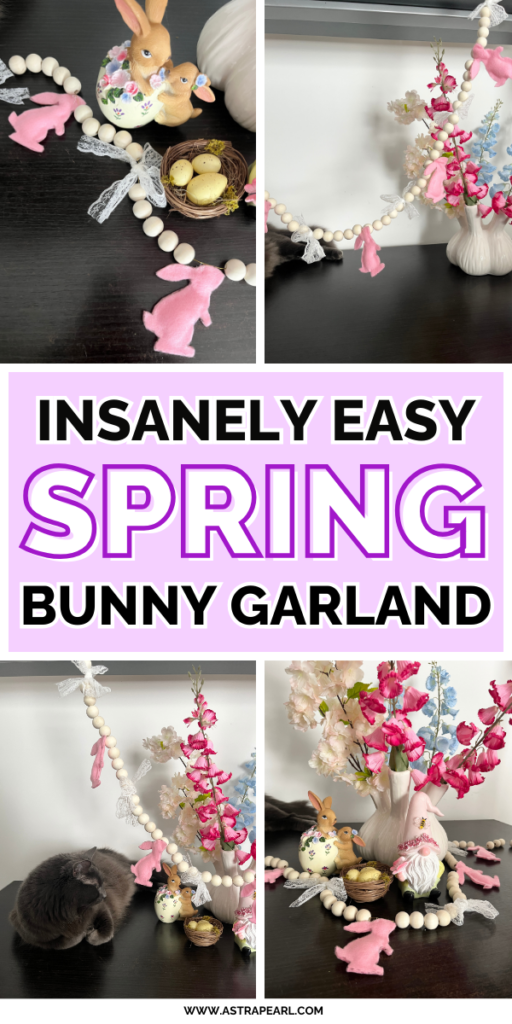
Now, let’s discover the final result!
So, here’s how my spring garland turned out:
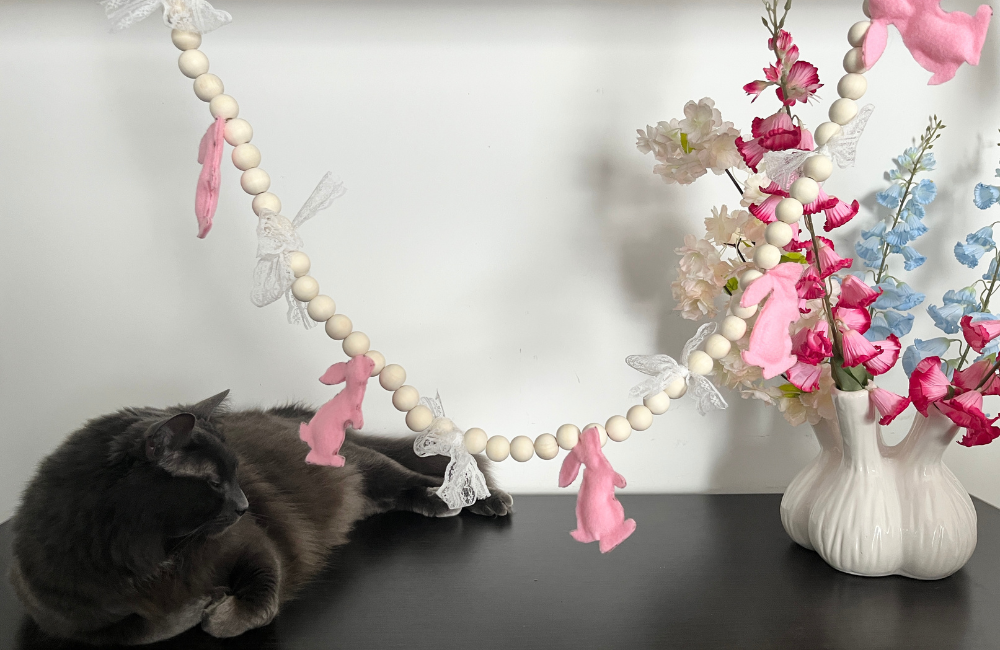
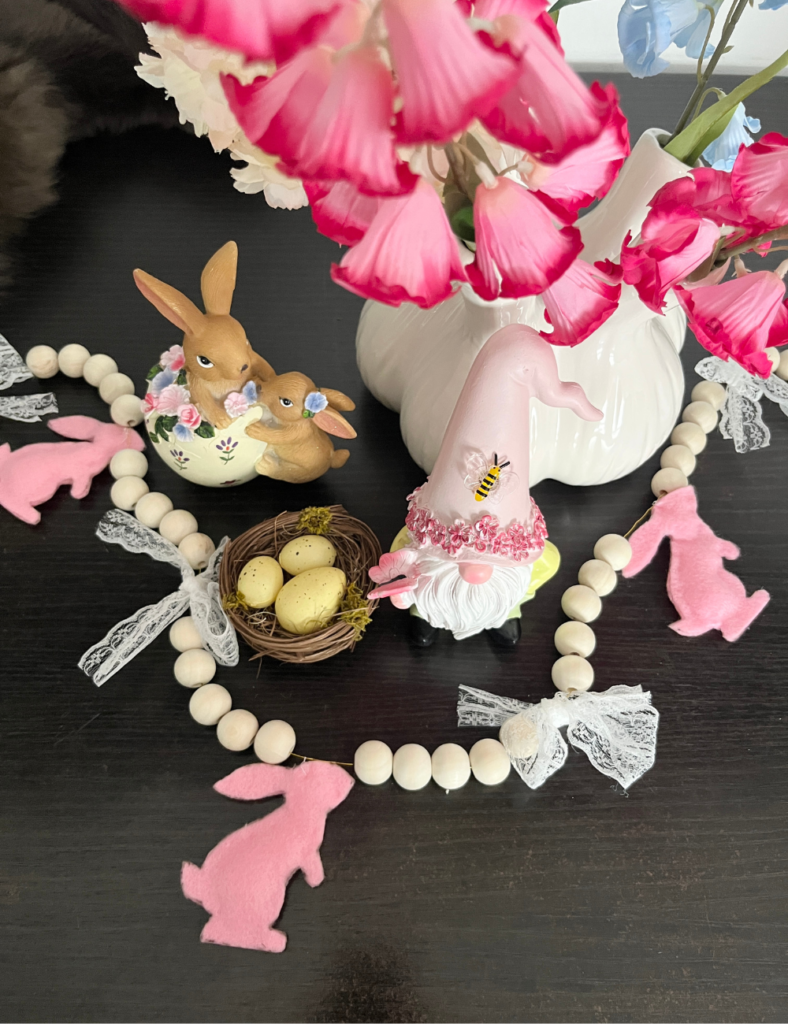

I hope this easy and quick spring bunny garland gave you inspiration to create your own DIY.
Remember that to create your own spring bunny garland, you must:
- Select a cohesive color palette: go for soft and pastel colors, such as blue, pink, or yellow;
- create your felt bunnies;
- and customize your garland according to your interior design style.
Stay tuned for more spring inspiration!
Discover More Spring DIY Ideas
- The Prettiest Spring Tray Decor (And SO Easy To Make!)
- Learn How To Make These Crazy Simple Spring Shelf Decorations!
- The Easiest Spring Fabric Garland DIY – No Sewing Skills Needed!
- Make Your Own Crazy Simple Spring Decor DIY (And It’s SO Pretty!)
- Easter Bunny Garland DIY: A Crazy Simple Way To Refresh Your Home!
- Make Your Own Easter Egg Garland Decoration – SO Easy and Quick!
- Late For Easter? This 10-Minute Easter Egg Garland DIY Will Save The Day!
- Learn How To Create This Crazy Simple Happy Easter garland DIY